How To Finish A Shed Interior
Ronan Farrow
Mar 31, 2025 · 3 min read
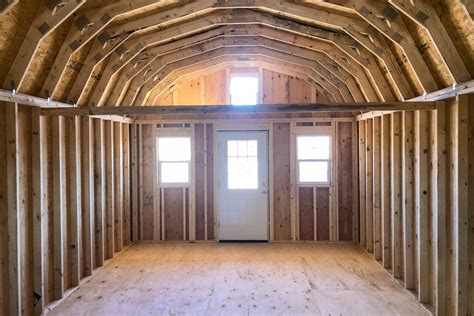
Table of Contents
How to Finish a Shed Interior: A Step-by-Step Guide
Building a shed is a rewarding project, but the real magic happens when you finish the interior. A well-finished shed interior transforms a simple storage space into a functional and inviting workspace, hobby room, or even a cozy retreat. This guide will walk you through the process, covering everything from insulation and drywall to flooring and electrical.
Step 1: Planning Your Shed Interior
Before you even pick up a tool, it's crucial to plan your shed's interior layout. Consider:
What will you use the shed for?
This dictates your needs. A workshop requires sturdy workbench space and ample power outlets. A storage shed needs efficient shelving and organization systems. A hobby room might need specialized lighting and ventilation.
What's your budget?
Finishing a shed can range from simple and inexpensive to quite elaborate. Setting a realistic budget upfront helps you make informed choices about materials and finishes.
What are your DIY skills?
Be honest about your capabilities. Some tasks, like electrical work, are best left to professionals unless you have the necessary experience and permits.
Step 2: Insulation and Vapor Barrier
Proper insulation is essential for a comfortable and energy-efficient shed, regardless of its intended use.
Insulation Types:
- Fiberglass batts: A cost-effective and easy-to-install option.
- Spray foam insulation: Offers excellent insulation value and air sealing capabilities.
- Rigid foam boards: Ideal for walls and ceilings, providing both insulation and a vapor barrier.
Vapor Barrier:
A vapor barrier prevents moisture from entering the insulation, preventing mold and mildew. Install it on the warm side of the insulation (the interior).
Step 3: Drywall Installation
Drywall provides a smooth, paintable surface and improves the overall appearance of your shed interior.
Drywall Installation Steps:
- Measure and cut: Measure the walls and ceiling to determine the drywall sheet size needed. Use a utility knife to cut the sheets to size.
- Attach the drywall: Use drywall screws and a screw gun to attach the drywall to the framing.
- Tape and mud: Apply drywall tape over the seams and use joint compound (mud) to cover the tape and screw heads. Sand smooth for a flawless finish.
- Prime and paint: Prime the drywall before painting for better adhesion and a more even paint finish.
Step 4: Flooring
Choosing the right flooring depends on your shed's intended use and the type of subfloor you have.
Flooring Options:
- Concrete: Durable and easy to clean, ideal for workshops.
- Plywood subfloor with vinyl flooring: A cost-effective and versatile option.
- Engineered wood flooring: Adds a more polished look, but it's more expensive.
Remember to ensure a level subfloor before installing any flooring.
Step 5: Electrical Work (Consult a professional if needed)
If you plan to use electricity in your shed, it’s vital to have it professionally installed to ensure safety and compliance with electrical codes.
Electrical Considerations:
- Circuit breaker: Ensure adequate protection with a dedicated circuit breaker in your main electrical panel.
- Wiring: Use appropriate gauge wiring for the amperage required.
- Outlets and lighting: Install outlets and lighting fixtures to meet your needs.
Step 6: Finishing Touches
Once the major work is complete, focus on the finishing touches to create a truly functional and aesthetically pleasing space.
Finishing Touches:
- Shelving and storage: Install shelving units, cabinets, or other storage solutions to maximize space and organization.
- Workbenches and countertops: If it's a workshop or hobby room, create dedicated work areas with sturdy workbenches and countertops.
- Lighting: Use ample lighting to create a well-lit and comfortable space.
- Ventilation: Ensure proper ventilation to prevent moisture buildup.
By following these steps and adapting them to your specific needs, you can transform your shed interior into a practical and enjoyable space. Remember to prioritize safety and always consult with professionals for tasks you're unsure about. Happy building!
Featured Posts
Also read the following articles
| Article Title | Date |
|---|---|
| How To Grow Azurescens | Mar 31, 2025 |
| How To Control Humidity In Incubator | Mar 31, 2025 |
| How To Cook Kokanee Salmon | Mar 31, 2025 |
| How To Get Rid Of Water Spots On Car Glass | Mar 31, 2025 |
| How To Dry Up A Goat | Mar 31, 2025 |
Latest Posts
-
How To Tighten Ball Hitch
Apr 02, 2025
-
How To Tighten A Emergency Brake Cable
Apr 02, 2025
-
How To Tighten A Ball Hitch
Apr 02, 2025
-
How To Throw A Beach Party
Apr 02, 2025
-
How To Think Like A Philosopher Peter Cave Pdf
Apr 02, 2025
Thank you for visiting our website which covers about How To Finish A Shed Interior . We hope the information provided has been useful to you. Feel free to contact us if you have any questions or need further assistance. See you next time and don't miss to bookmark.

